Ingredients
Before we begin the recipe, let’s take a quick look at the ingredients. Don’t worry — these are easy to find and you might even have most of them already in your kitchen!
For the Cake:
- 1 box of cake mix (choose your favorite flavor: vanilla, chocolate, or red velvet for a love-inspired look)
- 3 eggs
- 1 cup of water
- 1/2 cup of vegetable oil
- 1 tsp vanilla extract (optional, for extra flavor)
For the Frosting:
- 1 cup of butter (softened)
- 2 cups powdered sugar
- 2 tbsp heavy cream
- 1 tsp vanilla extract
- Pinch of salt
For the Coating:
- Candy melts or chocolate chips (in red, white, or pink for a Valentine’s Day theme)
- Sprinkles or edible glitter (for decoration)
- Lollipop sticks (for easy handling)
- Styrofoam block (for drying the cake pops)
Optional Add-ins for Special Touches:
- Crushed candy hearts
- Mini heart-shaped confetti sprinkles
- Colored sugar crystals
Now that we have everything ready, let’s get started with the process!

Step-by-Step Instructions: How to Make Love-Inspired Cake Pops
Making cake pops is not as difficult as it may seem. Once you break it down step by step, you’ll see how fun and creative the process can be. Let’s get started!
Step 1: Bake the Cake
First things first: preheat your oven to the temperature specified on the cake mix box (usually around 350°F). Prepare your cake mix by following the instructions on the package. This typically involves mixing together the eggs, oil, water, and cake mix until you have a smooth batter. If you’re feeling extra creative, you can even add a few drops of food coloring to give your cake pops a pop of color.
Once your cake batter is ready, pour it into a greased cake pan and bake according to the instructions. After it’s done, let it cool completely.
Step 2: Crumble the Cake
After your cake has cooled down, it’s time to crumble it into small pieces. You can do this by either using your hands or a fork. The goal here is to break the cake into fine crumbs so it will easily mix with the frosting later. Don’t worry if it’s a little messy—getting your hands involved is part of the fun!
Step 3: Make the Frosting
While your cake is cooling, you can make the frosting. Beat the softened butter until it’s smooth and creamy. Gradually add in the powdered sugar, mixing well after each addition. Add the heavy cream, vanilla extract, and a pinch of salt, and continue mixing until everything is well combined. You want the frosting to be smooth but thick enough to hold the cake crumbs together.
Step 4: Mix the Cake and Frosting
Now, take your crumbled cake and place it in a large mixing bowl. Add your frosting in small amounts, mixing it in as you go. The goal is to achieve a dough-like consistency. You want the mixture to hold together when you shape it into balls but not be too wet. If it feels too dry, you can add a little more frosting.
Step 5: Shape the Cake Pops
Once your cake and frosting mixture is ready, it’s time to shape the cake pops. Take small amounts of the mixture and roll them into smooth, round balls. Each ball should be about the size of a tablespoon.
If you’re going for a love-inspired touch, you can even shape some of the cake pops into heart shapes! Simply use your hands to gently form the ball into a heart by pinching the top and bottom of the ball together. You can also use a heart-shaped cookie cutter for a more defined shape.
Step 6: Insert the Sticks
Melt a small amount of your candy coating (about a tablespoon) and dip the end of each lollipop stick into it. This helps the stick stay in place once inserted into the cake pop. Gently insert the stick about halfway into each cake ball. Be careful not to push it all the way through the cake.
Step 7: Coat the Cake Pops
Next, it’s time to dip the cake pops into the melted candy coating or chocolate. Melt your candy melts or chocolate chips according to the package directions. You can do this in the microwave or using a double boiler.
Dip each cake pop into the melted coating, making sure it’s fully covered. Once dipped, let any excess coating drip off before moving on to the next step.
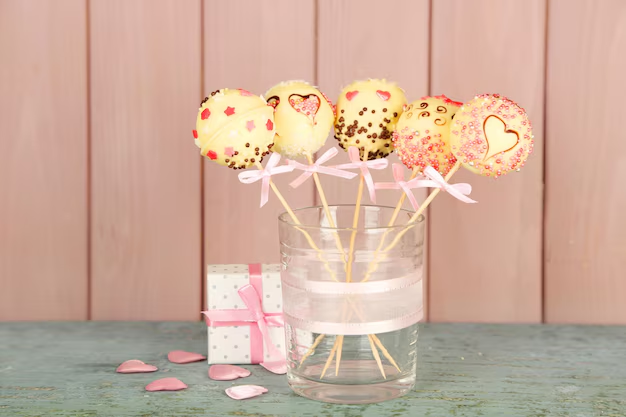
Step 8: Decorate the Cake Pops
This is where the fun really begins! You can get as creative as you like with the decorations. For a love-inspired theme, consider rolling your cake pops in sprinkles, edible glitter, or mini heart-shaped confetti. You can also drizzle a contrasting color of chocolate over the pops for a cute and sophisticated touch.
Step 9: Let the Cake Pops Dry
Place your decorated cake pops into a Styrofoam block or a cake pop stand to allow them to dry. This will ensure that they hold their shape and the coating hardens properly. Let them dry for at least 30 minutes before serving or gifting.
Conclusion
Cake pops are an adorable and delicious way to express love, whether it’s for Valentine’s Day, an anniversary, or just because. With this love-inspired cake pop recipe, you can create sweet, personalized treats that will bring joy to anyone who gets a bite. The best part is, you can get as creative as you like with the flavors, decorations, and shapes.
So, what are you waiting for? Get your baking supplies together and start making these love-inspired cake pops today. After all, what better way to show your love than through a little cake on a stick?


